RSS

Tag Archives: soil

Starting Tomatoes From Seed

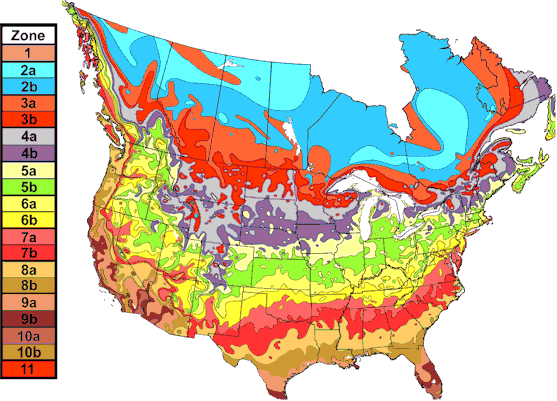
I recently heard on the news, the term Junuary to describe the freakishly pleasant weather we’ve been experiencing. No matter what you call this early spring time bliss, it’s time to start tomatoes, peppers, eggplants, and tomatillos in US Hardiness Zone 8b. Don’t know your hardiness zone? See below.

US Hardiness Zone Map

What follows is a quick and over simplified guide to starting your seedlings. It’s only meant to serve as a jumping off point to get you inspired to sow those seeds!

A warning to our friends in Zone 8a (just a little further inland), check your expected frost free dates! Our (on the coast) expected last freeze dates are right around March 1. Please keep in mind that this is only an estimate. It’s best to be prepared with frost protection when starting new seeds or setting transplants outdoors.

For warm season crops like tomatoes, peppers, eggplant, and tomatillos, it’s recommended to start them indoors 4-6 weeks before the last frost. In hot and humid climates like ours, tomatoes will often stop performing once the temperatures reach 85 degrees F. That’s why it’s key to give them the best chance possible by starting them indoors and setting them out as soon as all chance of frost has passed. By April 1, we want to have strong plants, ready to blossom and set fruit before the brutal summers arrive, just a few months away.

Check your seed packets. If there isn’t a recommended starting time, do a search for your variety online. Most tomatoes can be started early. Varieties that are quicker to mature can be started a couple of weeks later. One advantage of starting your seeds early is if they don’t germinate, more seeds can be sown. If you wait until after the last frost to start your seeds, your plants may not have enough time to mature before it’s too hot for them to produce fruit. Don’t despair, all is not lost. Fall brings the opportunity to start another tomato or pepper crop in Northwest Florida.

Starting your own tomato plants from seed is quite simple once you have all the right tools. You’ll need: seed starting trays or pots, seed starting soil, markers, some way to provide warmth to the soil, and bright light.

Paper seed starting pots

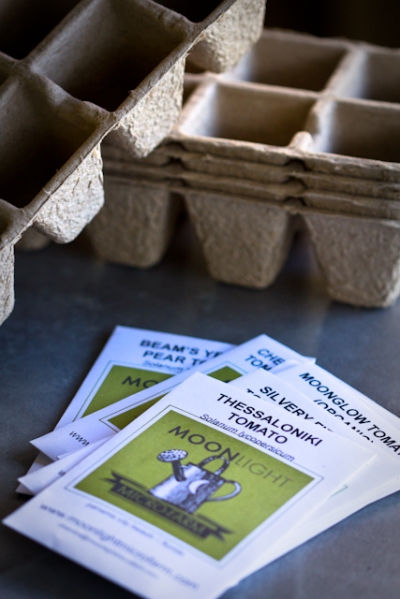
Seed trays can be any object that will hold soil and allow for drainage. You can use a simple paper egg carton or make your own paper pots from newspaper. Reuse a nursery flat or start seeds in any small pot. Some things work better than others. This year, I’m using all natural paper trays that will easily decompose in the garden.

Seed starting soil is ideally an inert soil mix that is light and fluffy, free of large debris, and drains well. I use a mix of peat moss and vermiculite. You could also use coco coir mixed with vermiculite or sifted compost. The important thing to remember is to choose soil that is free from other seeds and potential disease. You want to give your seedlings the best possible chance for survival.

Markers: a stick, a plastic take out knife, plastic label, wood label, pieces of tape, anything you can imagine to mark your seeds. Don’t skip this step, thinking that you’ll remember which variety is which. You won’t, trust me. I know.

Tomatoes need gentle heat to germinate. Temperatures need to be above 65 degrees and ideally between 70 and 75. You can use a seed starting heat mat, start the seeds indoors, in a green house, or make a simple cold frame out of a clear plastic tub with a lid. If you’ve created a makeshift cold frame outside, be sure to allow for ventilation, so the seedlings don’t cook.

Starting Tomato Seeds

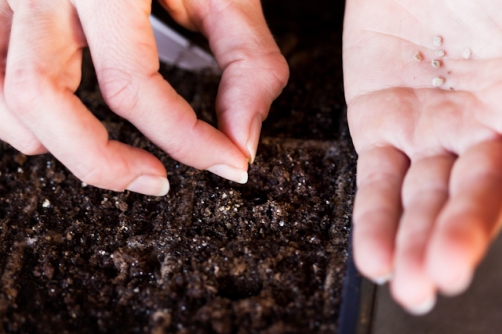
Sow your seeds according to the package directions. I use one seed per cell. I come back a week or two later and resow any cells that didn’t germinate.

As soon as the seeds germinate, you’ll need to move them to a location with bright light. A sunny window is okay if that is all you have, but ideally, they need 12-14 hours of bright light or they will become leggy. One option is to use grow lights, but that’s not necessary. Alternately, use a minimum 40W fluorescent light. I use an inexpensive shop light with two bulbs – one warm, one cool – and place the seedlings within 3″ of the lights.

Once the seedlings develop two true leaves (the second set of leaves), they’ll need to be transplanted to a larger container. Continue to keep them under the lights and in a relatively warm environment until it’s time to transplant them to the garden. The seedlings will need to be acclimated to the outdoors (hardened off) before transplanting.

Remember to have patience and be kind to your seeds and yourself. There’s nothing more rewarding that eating a fresh tomato from a plant you grew yourself, from a seed that you nurtured from the moment it germinated.

This is a list of the heirloom tomato and pepper seeds I’m starting this year: Purple Cherokee, Isis Candy, Reisentraube, Silvery Fir Tree, and Thessaloniki Tomato; and Fatalii, Thai Hot, Rooster Spur, Fish, Red Marconi, Orange Bell, Alma Paprika, and Serrano Tampequino pepper. Most of these varieties are available at www.moonlightmicrofarm.com.


Tags: , , , , ,

Earth Dumplings

seed bomb

Pin It

Many tales surround the history of the seed bomb, but I prefer this version of the ‘Earth Dumpling’ from Seed Freedom.

Seedbombs originated in Japan and are an ancient technique called Tsuchi Dango (粘土団子,土団子,土だんご) which means ‘Earth Dumpling’ which was reintroduced by a Japanese microbiologist in 1938 called Masanobu Fukuoka.Masanobu Fukuoka Pioneered the world of sustainable agriculture by initiating ‘natural farming’. Natural farming is a philosophy whereby gardening techniques do not include weeding, pesticides, fertilizers or tilling…mother nature is left to take care of the seeds we sow and she decides which crops to provide us with.

“Many people think that when we practice agriculture, nature is helping us in our efforts to grow food. This is an exclusively human-centred viewpoint… we should instead, realize that we are receiving that which nature decides to give us. A farmer does not grow something in the sense that he or she creates it. That human is only a small part of the whole process by which nature expresses its being. The farmer has very little influence over that process… other than being there and doing his or her small part.” — Masanobu Fukuoka

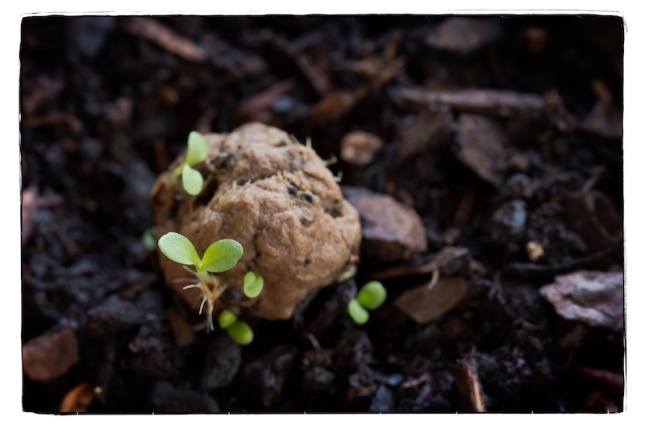
The photo above is my version of a Southeastern (US) native wildflower seed bomb for combating urban blight. They’re nice to simply put in pots too. I made mine with left over packing paper, instead of traditional clay, and a mix of coreopsis and blanket flower seed. We don’t have naturally occurring clay in our region and I didn’t want to buy any ingredients, though you could certainly use clay.

Ingredients and Equipment Used:

  • Repurposed brown kraft paper (3-4 letter sized pieces)
  • 3-4 cups of wam water
  • 1-2 tablespoons of wildflower seeds
  • two bowls
  • blender (I used a Vitamix)
  • strainer (I used one of my nut milk/ sprouting bags)

Preparation:

Shred the paper by hand into quarter size pieces. Soak paper for a couple of hours in warm water. Pour the paper and water mix into the blender in small batches and pulse blend. Be gentle on your blender. The paper can easily bind up the blade. Add more water if necessary. Pour the slurry back into a bowl and add the seed. You don’t need much seed for each seed bomb. Remember that each seed will grow one plant. If you use too much seed, the plants will crowd out each other, though some seeds will naturally disperse too. Mix thoroughly by hand.

Put the stainer over one of the bowls and pour the paper slurry seed mixture through the strainer. If using the nutmilk bag, squeeze the excess moisture out of the mix. Don’t squeeze too much because you want the paper pulp to be pliable. Next, form the seed bombs by pinching off a small amount and forming into a ball about 1/2 – 1″ in diameter. You can also use candy molds to make different shapes. Squeeze out the excess moisture as you form the balls. Place balls on a tray to dry. If you have a dehydrator, place the seed bombs in the dehydrator on the lowest temperature setting. The idea is to dry them out quickly before they have a chance to sprout.

That’s it! Now you’re ready to do some guerrilla gardening, lobbing seed bombs into hard to reach, neglected spaces for beautification.

If you love the idea of seed bombs, but don’t have the time to make your own, check out these fun handcrafted seed pops!


Tags: , , , , ,

Garden Preparations

Gathering materials is one of the most time-consuming aspects of preparing to prepare the garden. We decided to take the quickest route to completing the resource collection by purchasing ten 40lb bags of topsoil and a block of peat moss. While we were at the store, I couldn’t pass up the tantalizing display of 75% off bulbs – never mind that the bulbs aren’t necessarily native, edible, or even site appropriate. Sometimes, we just need a flash and a pop in the garden to give us the confidence and motivation to keep going through the seasons. Instant gratification. We also purchased a discounted wheel barrow, an axe, and a bag of lime for a total of $125. Ideally, I would have preferred to procure the topsoil and peat moss by other means, though scraping the forest floor for the few inches of nutritive soil that it may yield, would have taken considerable time. 

Read the rest of this entry »

 
1 Comment

Posted by on December 29, 2009 in DIY, Eden's Landing Garden


Tags: , , , ,

Garden Bed Sketches

Garden Bed Sections

I found this sketch that I drew a year ago, when I started toying with the idea of creating a garden at Eden.

Sketch 1 is a swale adjacent to a raised garden that is built up with sheet mulch.

Sketch 2 is a raised bed created from 8″ C.M.U.’s

List 3 is some of the wild edibles & medicinals that grow in our bioregion.

I’ll post a CAD design of the garden in the near future.

 
Leave a comment

Posted by on December 24, 2009 in DIY, Eden's Landing Garden


Tags: , , ,